- Photoshop CS3 or newer: If you’re using Photoshop CS3 or newer, you can easily readjust the displace settings.
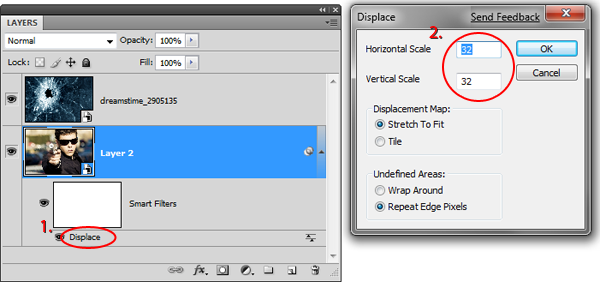
- Photoshop CS2 or older: If you’re using Photoshop CS2 or older, you’ll need to undo and use the displace filter again. Choose Edit > Undo to undo then choose Filter > Distort > Displace to use the displace filter again.
Step 7 – Save the displace map as a file
Change the blending mode of the current layer to normal.
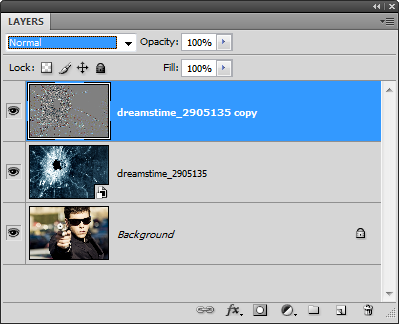
Choose File > Save As and save the file as “displace map” on your desktop.

Step 8 – Delete the displacement map layer and convert the background layer into a smart object
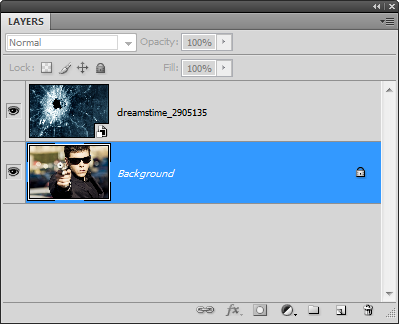
Before we use the displace filter, delete the layer with the bump map texture then select the background layer.
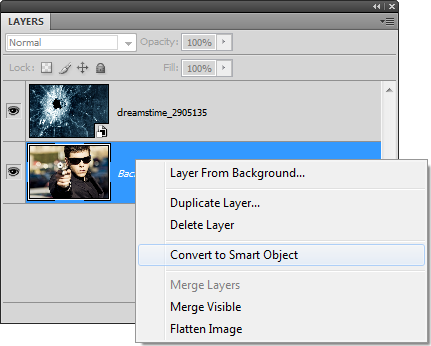
If you are using Photoshop CS3 or newer, convert the background layer into a smart object. This will let you
apply filters as smart filters so that you can go back and adjust the filter settings anytime. To convert a layer to a smart layer, right click on the layer then choose Convert to Smart Object. You can also do this by choosing Layer > Smart Objects > Convert to Smart Object.
Step 9 – Apply the displace filter
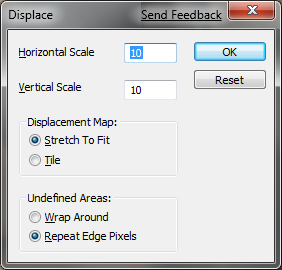
Choose Filter > Distort > Displace and start with the default settings shown in the image below. Click OK.
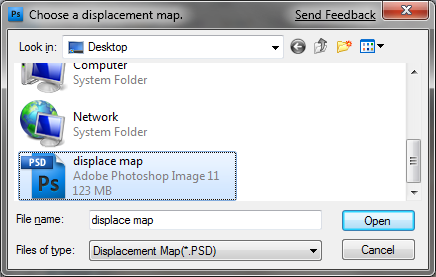
Browse and select the displacement map file that you saved earlier then click Open.
Your image should be displaced. Here’s what mine looks like so far. It is not strong enough but we’ll edit this in the next step.

Step 10 – Readjust the displace filter
Because the displace filter doesn’t give us any live preview feature, you’ll find that you need to readjust the settings once or more to get the results that you like.
This is what our image looks like after using better displace settings.

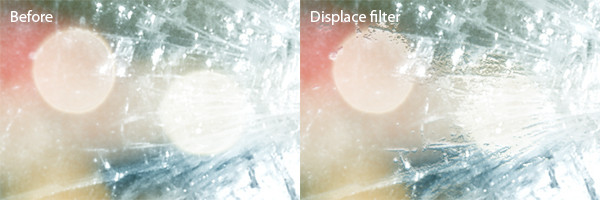
Here’s a comparison of the before and after effects of using the displace filter.
Step 11 – Add a reflection in the sunglasses
Select the layer with the bullet hole and duplicate the layer.
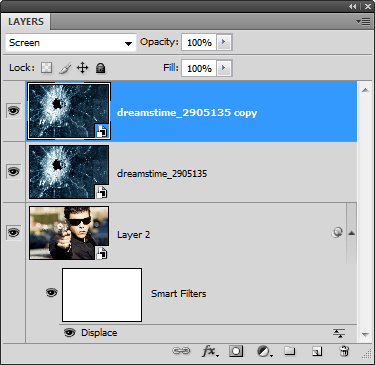
Choose Edit > Transform > Scale and resize the layer by clicking and dragging on the corners of the transform box. Make the layer a lot smaller like shown in the image below. Press enter on your keyboard to apply the changes.

Step 12 – Rasterize the layer with the reflection
We’ll be using the levels tool next but before we can access that tool, the layer needs to be rasterized. If you are using Photoshop CS2 or older, your layer is already rasterized and you can skip this step. If you are using Photoshop CS3 or newer, your layer is currently a smart layer. The levels tool doesn’t work on smart layers so we need to rasterize it. Right click on the layer (not the layer thumbnail) then choose Rasterize Layer. You can also do this by choosing Layer > Rasterize > Smart Object.
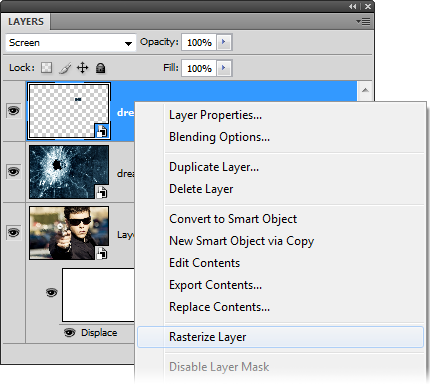
Your layer should be rasterize and you can tell it’s rasterized because it does not have the ![]() icon in the thumbnail.
icon in the thumbnail.

Step 12 – Blend the reflection into the sunglasses
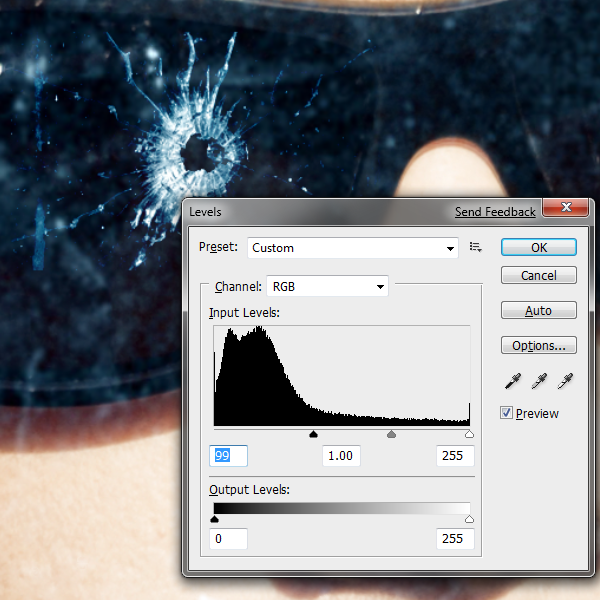
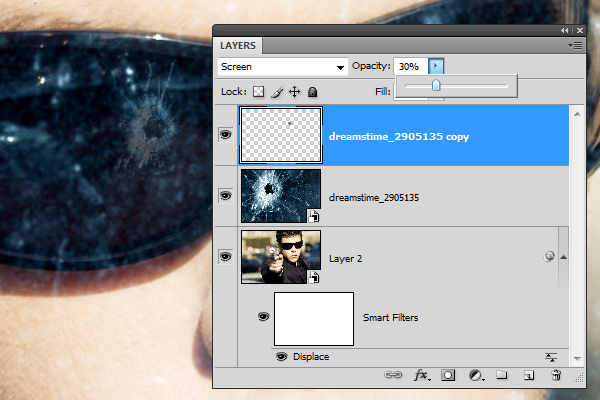
Now that your layer is rasterized, you can access the levels tool by pressing Ctrl+L or choosing Image > Adjustments > Levels. Use the levels tool to make the glass blend into the frames behind it. To do this, drag the black input slider towards the center until only the cracks are visible.
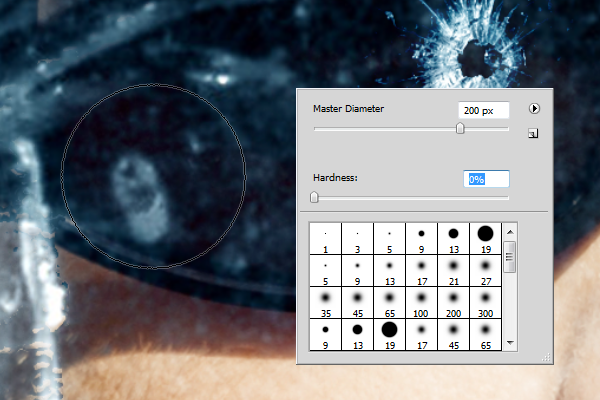
Select the eraser tool from the toolbar. Right click anywhere in the document window to bring up the brush settings for the eraser tool. Set the hardness to 0%. This will give you a soft edge as you erase.
Erase around the bullet hole so that only the cracks from the bullet hole are showing.
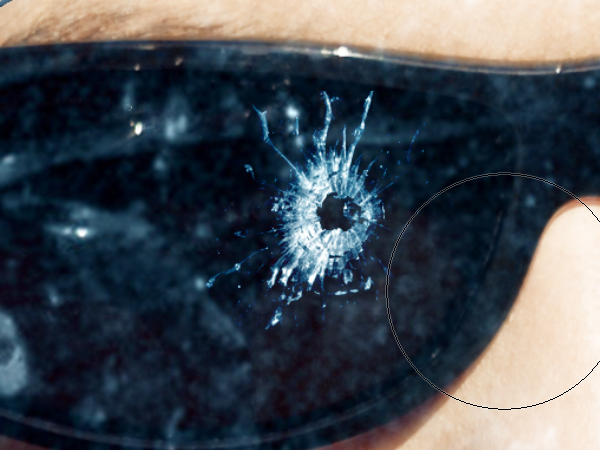
To complete the reflection, reduce the opacity to about 30%.
Step 13 – Prepare a new layer for a vignette
Add a new layer (Layer > New Layer) then position it as the top layer.
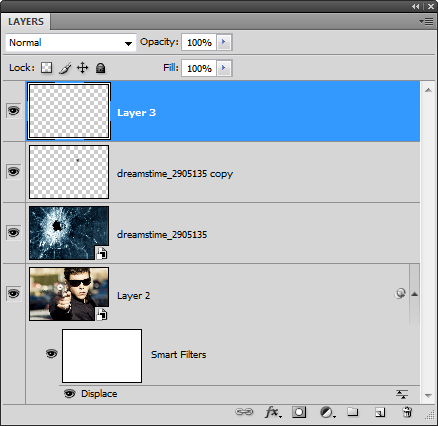
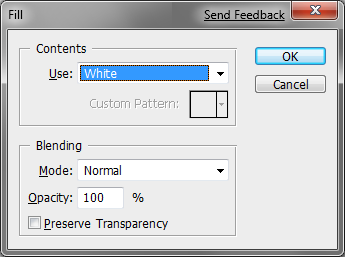
Fill the layer with white. To do this, choose Edit > Fill, apply the settings shown below, then click OK.
Your layer should now be a blank white layer.

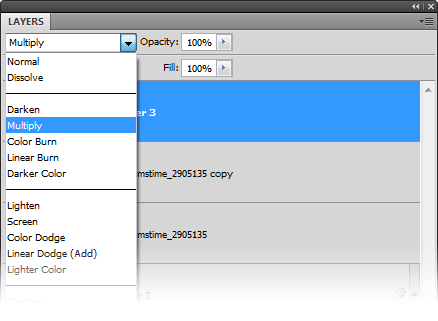
Change the blending mode of the layer to Multiply.
Step 14 – Add a vignette
Instructions for Photoshop CS2 or newer
If you are using Photoshop CS2 or newer, you can easily apply a vignette by using the lens distortion filter. Choose Filter > Distort > Lens Distortion. Adjust the two vignette settings (amount and midpoint) to your likings then click OK. If you don’t get the effect that you like, you can undo and use the lens distortion filter again with different settings.
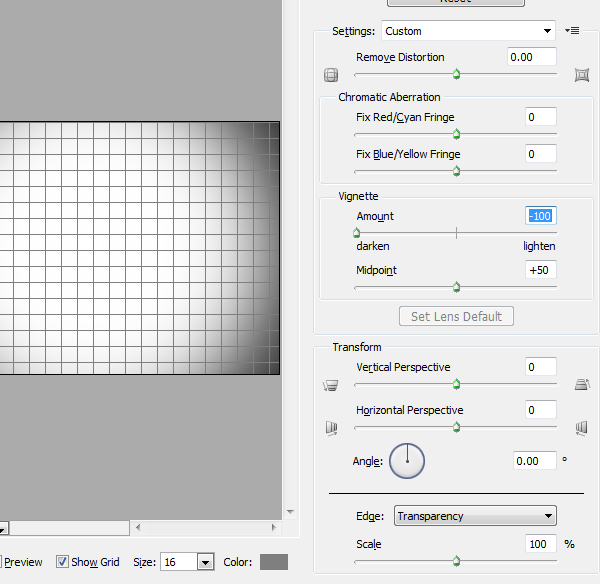
Instructions for Photoshop CS or older
First, make sure that you have snapping and rulers enabled. Open the view menu then ensure that the snap and ruler features are enabled.
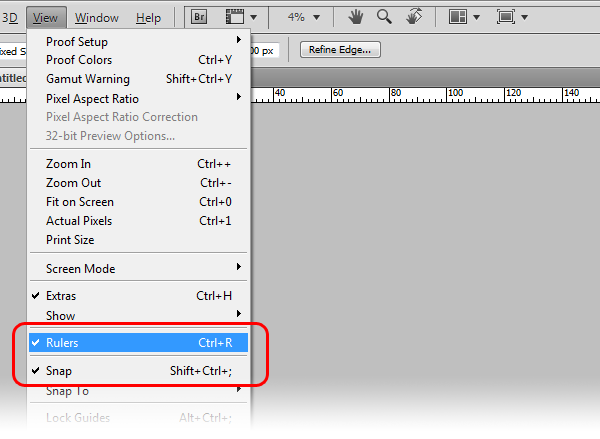
Click and hold on the left ruler then drag your mouse towards the center. A cyan guide will appear. Drag the guide near the center and it should snap into the center. Drag a second guide from the top ruler towards the center to create a crosshair like the image below.
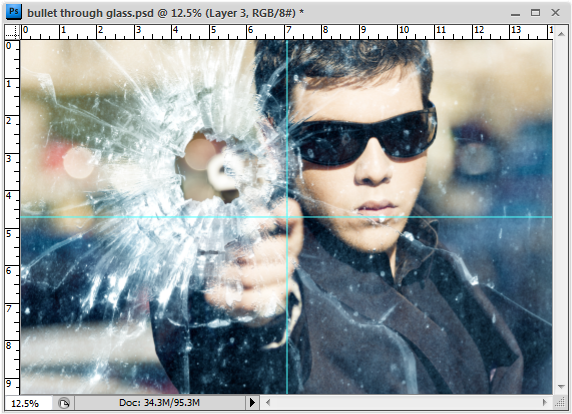
Choose View > Snap To and ensure that the guides option is enabled.
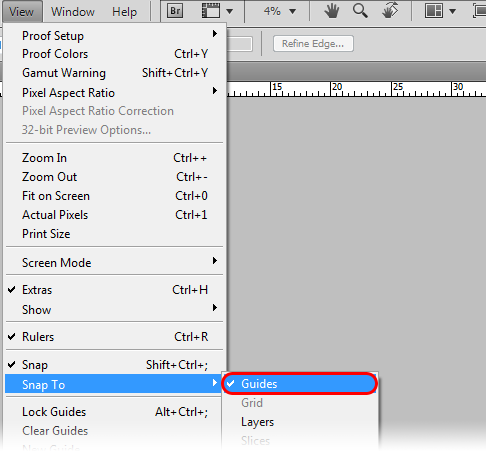
Zoom out so that you can see the entire image. Select the circular marquee tool. While holding the alt and shift keys, click and drag from the center where the guides intersect then drag out until your circular marquee is the length of your image.
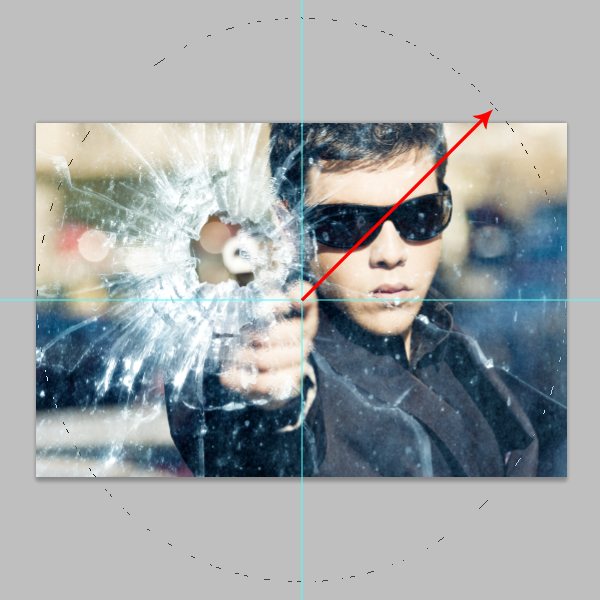
You should now have a selection like the image below.
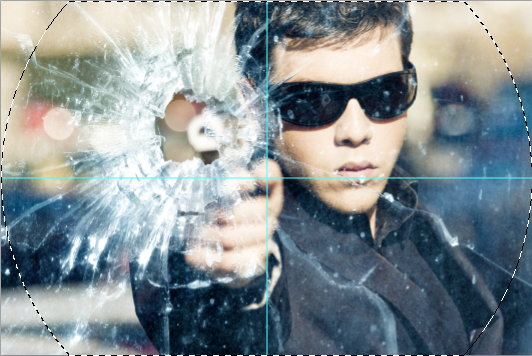
Choose Select > Inverse to inverse the selection.
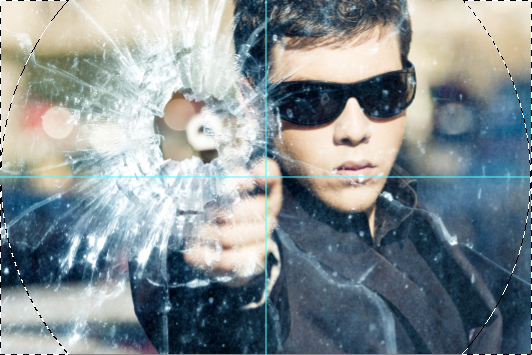
Choose Edit > Fill and fill the area with black. Now choose Select > Deselect to deselect the selection. Your vignette should look like the image below.

We’re done using the guides. You can remove them by selecting the move tool and dragging the guides back to the ruler. Choose Filter > Blur > Gaussian Blur to blur the edges. If you are working with a high resolution document and the gaussian blur filter isn’t strong enough, you can apply the filter again until you get the results that you like.
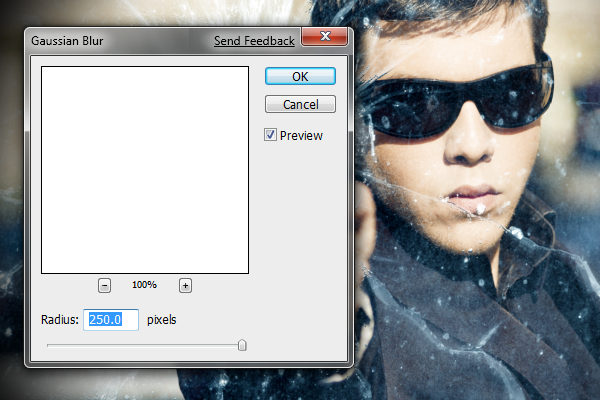
Here is what my vignette looks like after applying gaussian blur filter with a radius of 250 pixels two times.

Post Title
→Gunshot Through a Glass Part 2
Post URL
→http://guidice-galleries.blogspot.com/2009/05/gunshot-through-glass-part-2.html
Visit guidice galleries for Daily Updated Wedding Dresses Collection


