Showing posts with label Photoshop Tutorial. Show all posts

Transparent Glass Style


    Tutorial Description

    Platform: Adobe Photoshop CS or better
    Difficulty: Beginner
    Author: Vebyo Arson

    Download Source Files
    Transparent Glass Style

    People love glass effects. They also love transparent look, glowing and glossy as well. Now, we will learn how to make these popular effects. Less than 1 minute, you can get this Transparent Glass Style in Photoshop. Let's get started!

    Step 1

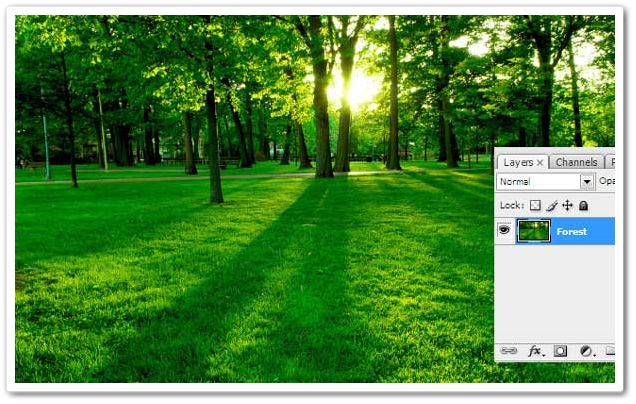
    Open any image in Photoshop. I recommended to open full color image or the real photo (not abstract) but it's up to you after all ^^.

    Straw Field

    Step 2

    Use Horizontal Type Tool (T) and write any text you want. In this tutorial I used white color (#FFFFFF), 72pt for size, and Gill Sans Ultra Bold for font.

    Transparent Glass

    Step 3

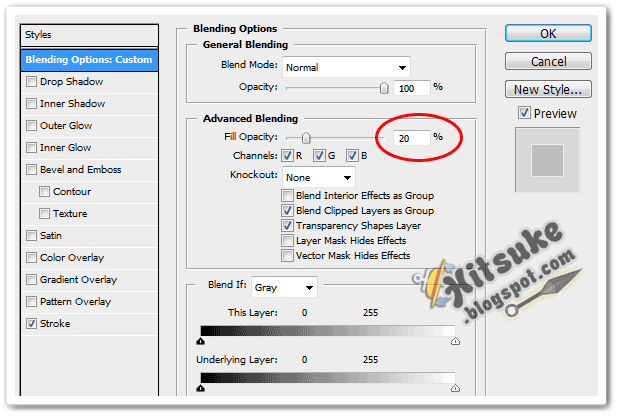
    Apply the following Layer Style to the "Transparent Glass" Text Layer (Double Click on it or go to Layer > Layer Style > Blending Options...).
    Blending Options: Custom – Set Fill Opacity to 20% under Advanced Blending

    Transparent Glass Blending Options

    Outer Glow: You may change outer glow setting if you want to.

    Transparent Glass Outer Glow

    Gradient Overlay: This is the crucial part of this step. Don't miss it!

    Gradient Overlay
    Transparent Glass Style Gradient

    Stroke: I used standard stroke here. White (#FFFFFF) for color, 3px for size in outside position and 100% for opacity.

    Transparent Glass

    Step 4

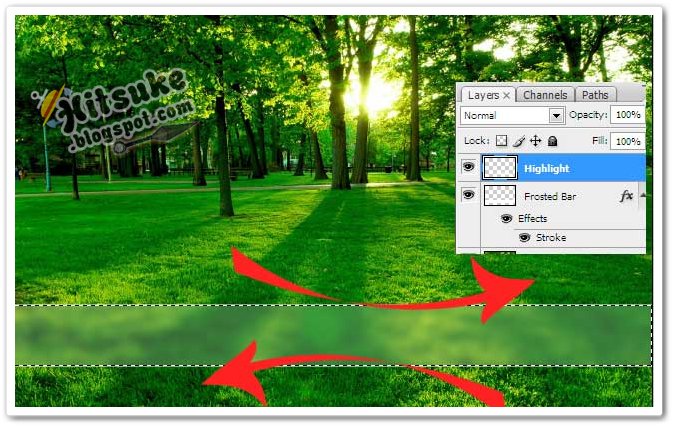
    Look what should you get now ...A Transparent Glass Style Effect.

    Transparent Glass Style

    If you take a look closer, it will be like the following image. It's so cool, isn't it?

    Transparent Glass Closer

    You may also change the color of the text if you like

    Transparent Glass Change Color


    Final Result

    Transparent Glass Style
    PSD Download Download PSD 3.04 Mb
    Local | Indowebster | 4shared | RapidShare | Ziddu

Post Title

Transparent Glass Style


Post URL

https://guidice-galleries.blogspot.com/2010/11/transparent-glass-style.html


Visit guidice galleries for Daily Updated Wedding Dresses Collection

Create Psychology Sticker

    How to Create a Psychology STicker

    Do you know why I make a psychology sticker even I an english student? the answer is when I was studying at english department my friend at psycholog faculty asked me to make it for her. So, I tried to do it although this is the first time I made a Sticker. Here you are

    Psychology_Sticker


    Follow this step to know how to make it

    Step 1 : Open new document 800x600 px fill it with black color. I use Pastor of Muppets font that I get from Here. Type the text in separeted


    Psychology_Sticker


    Step 2 : Add layer style at one of it

    Gradient Overlay

    Psychology_Sticker


    Stroke

    Psychology_Sticker


    and here is our result in this step


    Psychology_Sticker


    Step 3 : Copy the layer style and Paste to All of the font that you have created before


    Psychology_Sticker


    Step 4 : Create New Layer to make a border around it. You can use whether Pen Tool or Brush Tool that is up to easy for you. In this Tutorial I use Brush tool with White color.


    Psychology_Sticker


    Step 5 : Add layer Style to that border by Double-Click on it > Set the Outer Glow


    Psychology_Sticker


    Step 6 : To make your border and text in balance color, add the color balance just like this


    Psychology_Sticker


    here is my result at this moment

    Psychology_Sticker


    Step 7 : Add Shock Text Effect to the Text Layer

    Final Result

    Psychology_Sticker

    Created by Hitsuke.blogspot.com

    Powered by Bluecryztal.blogspot.com


Post Title

Create Psychology Sticker


Post URL

https://guidice-galleries.blogspot.com/2010/10/create-psychology-sticker.html


Visit guidice galleries for Daily Updated Wedding Dresses Collection

Blue crystal Shock Text

    Create Blue crystal Shock Text

    Blue Crystal Shock Text

    Step 1 : Create a 400x400px document, fill your background with black by choosing Edit > Fill and use Black


    Step 2 : Select Horizontal Type Tool(T) and use white color to write anything you want, like this:

    Blue Crystal Shock Text


    Step 3 : Now right click on the "text layer" and choose "Rasterize Type" to make it become a real layer

    Blue Crystal Shock Text


    Step 4: Duplicate that layer by right click again on it,select "Duplicate Layer" or you can press shortcut key Ctrl + J, press OK. Now we have two text layer.

    Step 5 : Select the Duplicate layer and set Filter > Stylize > Wind and click on "From the Left" option

    Blue Crystal Shock Text

    Step 6 : Press Ctrl-F twice to make this effect stronger

    Step 7 : Now selct Filter > Stylize > Wind again, but we click on "From the Right" option

    Step 8 : Again, press Ctrl-F twice to make it stronger! Here is my image at this time:

    Blue Crystal Shock Text


    Step 9 : Select Image > Rotate Canvas >90 o CW to rotate our image

    Blue Crystal Shock Text


    Step 10 : Now use the Wind Effect (repeat from step 5 to 8), here is my result for this step

    Blue Crystal Shock Text


    Step 11 : select Image > Rotate Canvas >90 o CCW to rotate it to normal state:

    Blue Crystal Shock Text


    Step 12 : Now right click on current layer, select "Layer Properties" (or simply double click on that layer). In "Layer Style" box, choose "Color Overlay" and choose blue (#01a6fb) color:

    Blue Crystal Shock Text

    Step 13 : Select your original layer and move it to Top.

    Blue Crystal Shock Text

    and that will become like this

    Blue Crystal Shock Text

    pay attention to its position. the original layer become the top of layer.

    Step 14 :

    Now you can see our result

    Blue Crystal Shock Text

    Step 15 : This is will be different from my last tutor Red Shock text.

    Double click at Top Layer or your original layer and set the style become like this

    • Drop Shadow

    Blue Crystal Shock Text

    • Gradient Overlay

    Maybe it need some practice to try.

    Blue Crystal Shock Text

    make sure your setting same as the picture above.

    • Storke

    Blue Crystal Shock Text

    Well done. Here is My Final Result.

    Blue Crystal Shock Text

    Created by Hitsuke

    powered by Green Arson

    http://bluecryztal.blogspot.com


Post Title

Blue crystal Shock Text


Post URL

https://guidice-galleries.blogspot.com/2010/10/blue-crystal-shock-text.html


Visit guidice galleries for Daily Updated Wedding Dresses Collection

Add a Cool Style to Photo Captions


    Tutorial Description

    Platform : Adobe Photoshop CS+
    Difficulty : Beginner
    Author : Vebyo Arson

    Download Source Files


    In this Quick Tip tutorial, I will demonstrate how to add a cool style to photo captions by creating a frosted glass-like text bar almost like Windows aero effect that can improve the look of your photos or designs.

    Step 1

    Open up any image in Photoshop. I used a forest photo. You can use a similar one if you like. Otherwise, any image will do. Unlock the background layer by Double-Clicking on the layer, name it "Forest".

    Cool Caption Style

    Step 2

    Create a new layer (Ctrl + Shift + N) on top of the "Forest" layer, and call it "Frosted Bar". Using the Rectangle Marquee tool (M) making sure you’re on the Frosted Bar layer, drag out a selection of the bar size that you desire, making sure it touches both sides of the document. The placement of the bar is up to you; in my case I am putting it down at the bottom of the image as shown.

    Cool Caption Style Effect 2

    Step 3

    Fill in the selection using the Paint Bucket tool (G) with white (#FFFFFF) and deselect the current selection (Ctrl + D).


    Cool captions Style 03

    Step 4

    Apply the following layer styles to the "Frosted Bar" Layer (Double Click on "Frosted Bar" layer).
    Blending Options: Custom – Set Fill Opacity to 20% under Advanced Blending

    Cool Caption 04

    Stroke: Using white (#FFFFFF) with size set to 2 and position outside and 50% opacity.

    Cool Caption Style 05

    Step 5

    We will need to edit our original image so it’s best to make a duplicate copy so we can always reverse it. So with the "Forest" layer selected duplicate it (Ctrl + J). With the "Forest copy" layer selected, load the frosted bar selection again by Ctrl + clicking the Frosted Bar layer icon. Apply a Gaussian Blur (Filter > Blur > Gaussian Blur) input 8 as the radius and click OK.

    Cool Photo Captions Style 06

    Step 6

    With the basis of our frosted bar created, we can now apply highlights. Create a new layer (Ctrl + Shift + N) on top of the Frosted Bar layer, and call it "Highlights". Load the Frosted Bar selection again if you have not got it already selected, and select the Brush tool (B). Using a large soft brush (500px, no hardness and White as the colour: #FFFFFF) paint highlights in the middle of the bar, both on top and below (as seen below), finally drop the opacity down of the "Highlight" layer to 60%.

    Cool Caption Photos Effect 07

    Cool Caption Photos Effect 08

    Step 7

    Our final step is to add text. Using the Text tool (T) add whatever text you want within the bar at whatever size suits you (In our case out font size is 24px). Drop the opacity down to 40% on the text, and change the blending mode to Overlay, and that’s it.

    Cool Caption Text Photo Effect 08a


    Final Result

    Take a look at the final image. Hope you enjoyed the tutorial!

    Cool Caption photos Style final image


    PSD Download Download PSD 3.76 Mb
    Local | Indowebster | 4shared | RapidShare | Ziddu

Post Title

Add a Cool Style to Photo Captions


Post URL

https://guidice-galleries.blogspot.com/2010/09/add-cool-style-to-photo-captions.html


Visit guidice galleries for Daily Updated Wedding Dresses Collection

Popular Posts

My Blog List